For more details on how the UserData repo/folder fits within TeamMentor's architecture, see these posts:
- Writing RazorSharp script to import TeamMentor users
- Creating QA versions of TeamMentor UserData repository, and using branches to show/test the multiple config options
- Creating a version TeamMentor which uses the new GitUserData.config file
- Practical Example of using Web CSharpREPL in TeamMentor’s development/customizations
- Using CSharpRepl to batch change TeamMentor’s users email and settings
- Running Customized C# code loaded from TeamMentor’s UserData repository
- Using NGit to create native Git support in Azure deployed app (with automatic pushes and pulls)
Step 1: Create UserData repo in GitHub
The first task is to create a Private repo to hold the UserData contents.
Important: Because it will contain sensitive data about the target TeamMentor instance (like password hashes, session IDs, emails, user activity tracking, SMTP account details and encryption key/salt), don't create a Public repo!
In GitHub, login into the desired account and go to the New Repository page:
In this case I'm going to create the Site_TM_34_QA_Azure repo, where I followed a convention that we have for UserData repos nanes: Site_{Url} or Site_{ServerType}. Which in this case is Site_TM_34_QA_Azure
Step 2: Make sure the repo is created with at least one file
If you chose the option to add a default README file in the previous step, you can ignore this, but if you didn't you will need to make sure that this repo has at least one branch and one file (or the Git Clone from TeamMentor will be left in a non-working state).
The good news is that you can easily do that from GitHub's interface.
On the Quick setup section, click on the README me link:
... which will open a web UI where the README.md file can be created:
... the target repo is now in state that can be used by TeamMentor
Step 3: Create a GitHub Personal Access Token to be used to access this account from TM server
As with the previous scenario, that is done on this Admin page
On the resulting page, copy the token (in this case c78fa4d5dcf1b9f521a99396d667a00297734a2b )
This Token will used together with the HTTPS git url (https://github.com/DinisCruz-Dev/Site_TM_34_QA_Azure.git) in the format: http://{username}:{password/token}@github.com/{GitUser}/{TargetRepo}.git. In this case:
https://DinisCruz-Dev:c78fa4d5dcf1b9f521a99396d667a00297734a2b@github.com/DinisCruz-Dev/Site_TM_34_QA_Azure.git
Step 4: Configure TeamMentor Server to use GitHub's UserData repo:
next open TBot's Edit GitUserLocation page:
... and enter the Git Url (shown above) in the Git User Location textbox:
Once that is done, reload the server cache (which will trigger the UserData setup):
This happened because a new UserData user store was created which didn't not had any accounts. In those cases TeamMentor server engine will create a default admin account using the details provided in TMConfig.config:
We can also double check on the TBot's DebugInfo page that the UserData now points to a different folder (note that the folder name is based on the repo name)
We can also confirm in the DinisCruz-Dev/Site_TM_34_QA_Azure repo that the UserData default files have been created (which also confirms that the connection between TeamMentor and Git's UserData repo is working ok)
Step 5: Create a new user and confirm that it shows up in GitHub
If you look at the Users folder in the GitHub repo, you should see on file in there (which represents the default admin user)
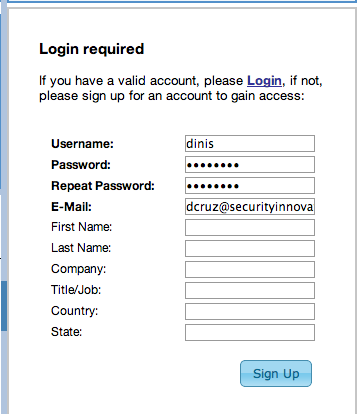
Next, create a new user (using for example the form provided in the home page of the target TeamMentor site):
Once the account is created:
Go back to TBot and reload the UserData (which will trigger a Git Pull and Push of the UserData repo):
Reload the GitHub User's folder and notice that there are two xml files in there:
A quick look at the commits of this repo, will also show the Commits created by TeamMentor's backend:
Now logout the admin user and login as the new dinis user:
... reload the UserData objects:
... and note in UserData GitHub's repo that there are a number of new commits:
For example, here is the 'Logout user activity log' for the admin user:
... and here is the UserActivity for the dinis user:
Step 6: Add a Library from a GitHub Repo
In order to make this a working server, we need to update the SecretData config file:
With the location of the Library GitHit repo (see Using TeamMentor 3.4 TBot admin pages to load and sync a Library hosted on GitHub for a detailed explanation of its origin)
Next reload the Cache:
On completion you should see a message with the number of Libraries and Articles in the current server:
And reloading TeamMentor will show the imported Library fully loaded and ready to be used:


