- Using AngularJS in Eclipse, Part 1) The Basics
- Using AngularJS in Eclipse, Part 2) Add Some Control
- Using AngularJS in Eclipse, Part 3) Wire up a Backend
- Using AngularJS in Eclipse, Part 4) Create Components
I'm doing this on an OSX laptop and the first step was to download and unzip (eclipse-standard-kepler-SR1-macosx-cocoa.tar.gz (32bit version of Eclipse's Kerpler) into the ~/_Dev/_AngularJS folder.
I fired up eclipse, chose the ~/_Dev/_AngularJS/workspace as the workspace root and installed the Eclipse Grovy REPL Scripting Environment 1.6.0 (update site) and Angular-JS Eclipse Tooling (update site) plugins.
1) Creating an Angular JS Project
After restarting eclipse, I right-clicked on the Project Explorer view and chose the New -> Static Web Project menu item

... set AngularJS_Tests as the project name and clicked Finish

... switched to the Web Perspective

... with the Project Explorer view now looking like this:

With the final setup being the conversion into an AngularJS Project

2) Creating the The_Basics.html file
To create the first test file, I right-clicked on the Web Content folder, and chose the New -> Html File menu option:

... set the file name to The_Basics.html and click on Finish

NOTE: The reason this first file is called The_Basics.html is because I'm going to be using the examples from AngularJS' home page http://angularjs.org/

Once the The_Basics.html file opens up in eclipse

... I change its contents to the code sample from http://angularjs.org/

Note how the AngularJS Eclipse plugin successfully detects the Angular attributes and showed relevant information about it.
Here is ng-app:

Here is ng-model:

3) Fixing the undefined Attribute name issue
Since I chose to the Eclipse's Static Web Project, when we save the The_Basics.html file (and if the Eclipse's Html validation settings are the default ones), the following error will show:

... which basically means that Eclipse is not recognising the AngularJS Html attributes:

To fix this, I went to the AngularJS_Test project's Properties, opened the HTML Syntax page (from the Validation section) and set to false the Undefined attribute name setting (in the Attributes' options , not the Elements)

With that config change, there are no problems in this page, and hovering on top of one the AngularJS directives will show the correct tooltip:

4) Viewing and previewing the The_Basics.html page
Since at the moment we only have one page, we can view it directly without needing a Web Server.
To do that, I clicked on the html file and chose the Web Browser option from the Open With menu:

This will open the default Eclipse Browser

... with the AngularJS test working as expected (in this case any text typed in the Name TextBox will automatically be shown in the page:

We can also preview some of the changes in real time, by choosing the Web Page Editor:

... which will look like this (note the non-processed HTML at the top and the HTML code at the bottom):

Opening up the Preview tab (from the default Design tab) will allow us to test the page currently being edited (note how Angular JS is working):

This means that (when in the Design tab) we can edit the AngularJS HTML page and see the changes immediately:

NOTE: This version of the Web Page Editor doesn't render the CSS while in that Design mode, which means that if we add bootstrap to this project:

... the CSS will only be visible when in the Preview tab:

4) Creating a Git Repository for the files created
The best way for me to share these files is via a Git Repository, so the final step of this post is to create one on the files we have already created.
Since we are in eclipse I tried to create an Git Repo for the current project:

But the Git Repository wizard:

... didn't work, because it expects the target folder to not exist:

This was easily solved via the command line (by executing $ git init on the AngularJS_Tests folder)

Now that we have a git repository, I was time to open it:

... using the Git Repositories view
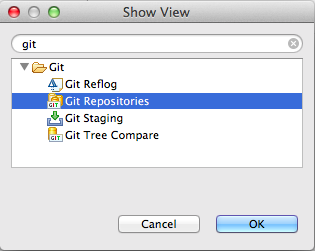
... where we can use the Add an existing local Git repository link:

... to open the repository just created:

In order to create a git commit, I also opened the Git Staging view:

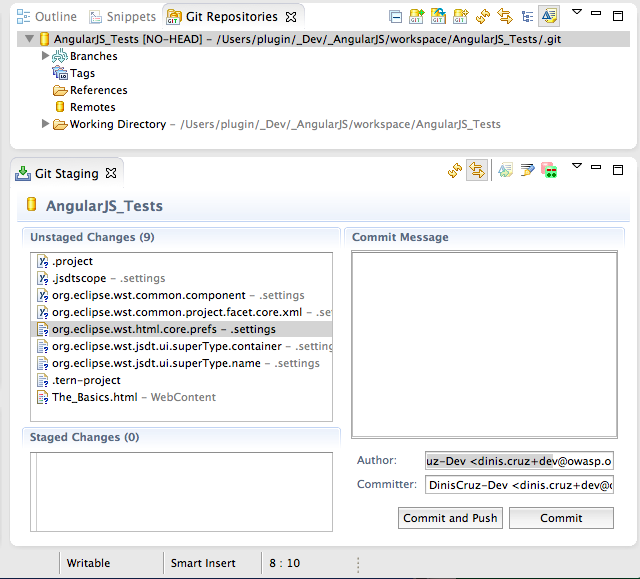
To commit the files drag-n-drop them from the Unstaged Changes to the Staged Changes, and write a commit message:

