Firebase really seems to fix one of the pain points that I currently have in client-server development, which is how to send/synchronise data across multiple clients (including the server).
I first heard about Firebase from the Wire up a Backend example that can be found at http://angularjs.org, and today I was able to give it a test drive (since I want to use it on the AngularJS front-ends that I'm currently developing for TeamMentor)
1) Creating an Firebase account
Lets start with creating an account and following the Firebase 5 minute tutorial.
The process of creating an account is just a case of going to https://firebase.com


... and that's it:

Firebase by default creates a test app, which can be immediately accessed by clicking on the blue View Firebase button:

2) Firebase tour
On first load of the Firebase control panel, we are presented with the offer to take a tour, which is a great way to understand the basics of how it works.

The first step of the tour is to add some data:

... directly on the current's App data viewer:

After we click on the Add button, we will see that our data is now part of this Firebase App data stream:

Next (after clicking on the See it in action link), we get this mini chat application with 3 messages:


... and look back to the Firebase admin panel, we will see the 4 messages (3 added by the Sample Chat Application and the one I added manually)

The final step of the tour is to make a change directly on the Firebase admin panel:

... and confirm that the value was automagically changed in the Sample Chat Application (in real-time with no user interaction)

3) Creating a simple Html/Javascript page to test it out
Note: The next set of example will use code snippets provided by the Firebase Web Quickstart Guide

Since I'm going to use Eclipse (Kepler), the first step is to create a new Static Web Project

... with a simple HTML inside:


To see this in action inside Eclipse, I opened up the admin Url in a Browser window (I wonder how long until an Eclipse Firebase plugin is created), and I logged in:

4) Setting and Pushing data
At this stage I had the Html at the top and the Firebase admin panel at the bottom (note the required full url in the var myRootRefnew Firebase(...) Javascript code):

Next step was to open a Web Browser with the test page:


Next step was to try setting some name-value pairs (i.e. a typical JSON string):

... which looked like this after execution (note that I didn't refresh the Firebase admin panel (it also uses the WebSocket technology to keep itself up-to-date))

Next I tried the push method (which behaves like an array and was the technique used in the chat example):

Here is the execution result (note how there is now an extra TreeNode with the data provided)

5) receiving events
So far we have been setting/pushing data into Firebase, but what is also really powerful, is that we can subscribe to server-side events, and update the browser/ui when content changes.
The example below shows how to get a callback every-time a new item is added:

Now on refresh (screenshot below), the new children will be shown on the page:

One observation, when we subscribe to the child_added event, any changes made directly in Firebase's admin panel:

... will only be seen when we refresh the page (where all items are viewed as new children)

To see the changes in real-time, we need to change the event to child_changed :

Now (on refresh) we get an empty list:

... but if the content is changed on the Firebase admin panel:

... the child_changed event is triggered, and we will the new content changes on the browser (without page reload)

5) Consuming and Sending events using REST API
Now that we can create and consume Firebase events using Javascript, it is time to try their REST API.
For that, I'm going to use the Eclipse Grovy REPL Scripting Environment 1.6.0 so that I can do it directly from Eclipse
Note: most scripts shown below are on this gist
The first test was to get the current data set, which is easily retrieved via a simple GET request to the Firebase url for the current application (with a .json appended to in the end of the admin url):

Since we are in eclipse, here is the code to open the JavaScript Editor programatically with the json data received:

By default the data received from the server has no formatting:

But since we are inside the Eclipse JavaScript Editor if we assign it to a variable, we can easily format it:

After doing this, I discovered that if we pass a ?print=pretty to the Firebase url:

... the received json data will already be nicely formatted:

In the example below I used the Groovy REPL Execution result window to see the formatted json data:

Next thing I wanted to try was to see how a REST change would be shown in real time in the browser.
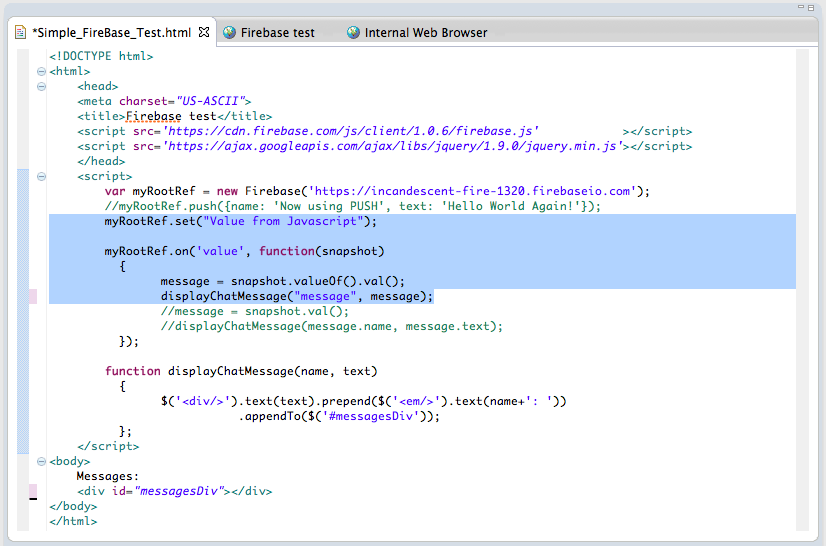
Because my next REST request will use the HTTP PUT command (which is equivalent to the Firebase set Javascript function), I changed the Html page to display and listen for Firebase values (vs arrays with name-value pairs)
Note the snapshot.valueOf().val() command below:

Next I used the Groovy script below to send a PUT command (I could also had used the Groovy HttpBuilder or the Java Firebase libraries):

When executed, this script will change the value of the current Firebase app to "Data from Groovy!!!!", which will be shown in real-time (i.e. no browser reload) in the opened test page:

We can also submit (i.e. PUT) name-value pairs:

... which will look like this on the Firebase admin panel:

Next test was to see how to use POST (instead of PUT) on the REST API (in order to replicated the Firebase push command).
To see the result, I changed back the html page to handle items (vs 'a value'), and changed the on event hook to be child_added:

On refresh, this is what the test page looks like:

... and if we send data using POST on the REST call:

... we will get a callback in real-time (again with no browser refresh):

A real cool feature of Firebase is how easy it is to create new namespaces (or areas/objects) for specific types of data.
For example, if I add Area51 to the firebase url (see the highlighted text below)

... the data will now be stored inside an Area51 object/area/namespace on the current Firebase app:

6) Programatically add new items to the Chat window
Finally coming back to the chat window (see below), when I saw that example, one of my first questions was "How to programmatically submit data to it?

Hopefully by now you should have a clear picture of how to do it, but just in case, here is how I did it :)
For reference, here is what the data looks like:


And now, after executing the above script, the chat window will contain our new message:

Although both chat application and test html page are not vulnerable to XSS, it is very easy to create an DOM based XSS in this type of real-time apps.
See my next post on XSS considerations when developing with Firebase for more details on this topic.