Since there is quite a lot of passion in the kids for Minecraft, I decided that for this term, we would try to use a Minecraft server in class, and see if we (me and kids) can figure out how to use Minecraft without a mouse (ie, with only programming).
Since my first experiments with a Minecraft server where quite positive (see Setting up a CraftBukkit based Minecraft server on OSX (Nov 2013)) I decided that it was time to take it up a notch, and try to create a Minecraft server in Azure (so that the kids can access it from home).
Here are the steps I took:
Step 1) Create an Ubuntu server in Azure
Assuming you have an Azure account, login into the management console, go into the Virtual Machines section, and chose to add a new one.
Here are the configurations I used to create an Ubuntu server in a couple minutes, (hosted in a Ms Data Center somewhere in West Europe):

After clicking on the Create a virtual machine link, a new entry should appear in your virtual machines list.
First with a Provisioning status:

... then with Starting status:

... and finally with a Running status:

Step 2) Connect to the VM using SSH and install Java
To connect to the server, just use the name provided with .cloudapp.net (in this case minecraft-w4.cloudapp.net )

One little mistake I made was not to set the username of the ssh user, which in Azure's Ubuntu case is azureuser

Once inside the server, I checked if java was installed:

And since it wasn't, I quickly added it using apt-get install

Once the install completed:

.... I confirmed that java was correctly installed in this server:

Step 3) Download and install the official Minecraft server
Using the link from https://minecraft.net/download I used wget to download the minecraft_server.1.7.4.jar:

To help starting it, I created a simple start.sh with the recommended Minecraft server start command:

Which can be used like this to start the Minecraft server (note that I had to rename the downloaded minecraft_server.1.7.4.jar into the expected minecraft_server.jar)

During the first run, the Minecraft world will be created, and eventually we should have visual clues that confirm that the minecraft server is running ok:

Note: before we can access this server from a Minecraft client (for the fitst time), we need to go back to Azure and open the Endpoints section of the minecraft-w4 VM

In there, we need to add a new endpoint:

Which maps the internal 25565 port into an internet-accessible port (in this case I chose port 80, to see if it helped with the school's proxy):

The rule change takes about 30s to be fully updated and active:


... then the Direct Connect button

... where we enter details of the server we created (and the port setup in the Endpoints section)

After clicking on Join Server, the Minecraft client should say that it is Logging in, and the server should have an log message confirming that the user joined the game

Since I also wanted to try Minecraft server commands from the client, I needed to make the user I logged is as an Operator of the current server/world

Here is a screenshot that confirms that the current client is successfully connected to the previously created Ubunto server:

Here is how I changed the current user's gamemode from survival to creative

Here is a list of server side commands that can also be executed from the Minecraft client (most need op privs (I think)

To stop the server, we can use the stop command, which will save the current status and try to do a clean shutdown:


Step 3) Download and install the CraftBukkit server
Since the previous installation/execution was so smooth, I decided to quickly try the Bukkit's CraftBukkit server.

I used wget again to get the craftbukkit.jar file

Once the download completes:
And a useful start.sh script is created:

The CraftBukkit server started ok:

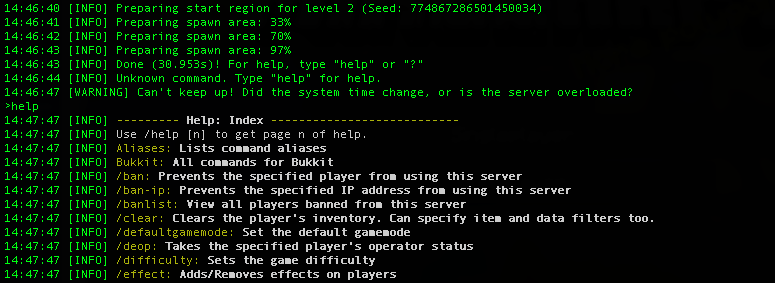
After the installation/execution completed, the help command only shows a lot more options:
IMPORTANT note: due to the large number of changes made in the 1.7.4 version of CraftBukkit (by Mojang), the Minecraft clients need to be configured to use the 1.6.4 version (since that is what is supported by the current CraftBukkit server)

Once the new 1.6.4 profile is created:

It is possible to connect to the server using:

....which should look something like this:

We can also confirm on the server side that the user is logged in ok.
In this case I'm making the owasp user an operator/amin of this Minegraft game

Step 3) Download and install the ScriptCraft plugin
One of the coolest Bukkit plugins is the ScriptCraft one, which allows of the execution of Javascript from the Minecraft script/command writing section:

Here is the version I downloaded:

And here is the use of wget to get the scripcraft.jar from the correct download url:

Here is how I started it (notice the reference to scriptcraft in the logs):

The list command shows a lot more options in CraftBukkit, than in IIS management console:

But since we have ScriptJar installed, we can just do this to create a box of type '2', with 2 squares width, 2 squares depth, and 2 squares height

Here is what the /js box(2,2,2,2) command produced

Finally, as a pretty spectacular example of what can be created using ScriptCraft Javascript APIs, the simple command /js new castle():

... will create this (quite big) castle, in a matter of seconds:

So far the server seems to be hanging in there (the kids have logged in a couple times).
Now what I need is to add a couple Minecraft server admin tools, so that I can keep an eye on it (and detect any bad behaviour). Any recommendations on good monitoring plugins for CraftBukkit?